
Replacing an RV Couch Quickly and Easily
For years, we were nervous about modifying our camper. We were worried that if we changed our rig, it would decrease the resale value. However, as our children have grown, we have realized that we will be purchasing a new camper very soon if we do not modify our trailer for comfort. We are not saying we will drill holes in all the walls, but it is time for a few upgrades. First up, replacing an RV couch!
Replacing an RV Couch is easy. First, remove the current couch and then put the new couch in the camper. Next, make sure to purchase a sofa made for RVs. These couches are delivered in sections, making them simple to install in a trailer.
We never liked the factory couch. It is a 58″ jackknife sofa made to sleep a child. However, we do not have children small enough to use it. The couch is not comfortable, and we have to place many pillows behind our backs to sit on it. It was to the point that we didn’t even want to use the sofa anymore.
We set out to replace the sofa in our RV. Sean and I wanted to share our experience in case you want to replace your couch too!
Our Guide to Replacing an RV Couch
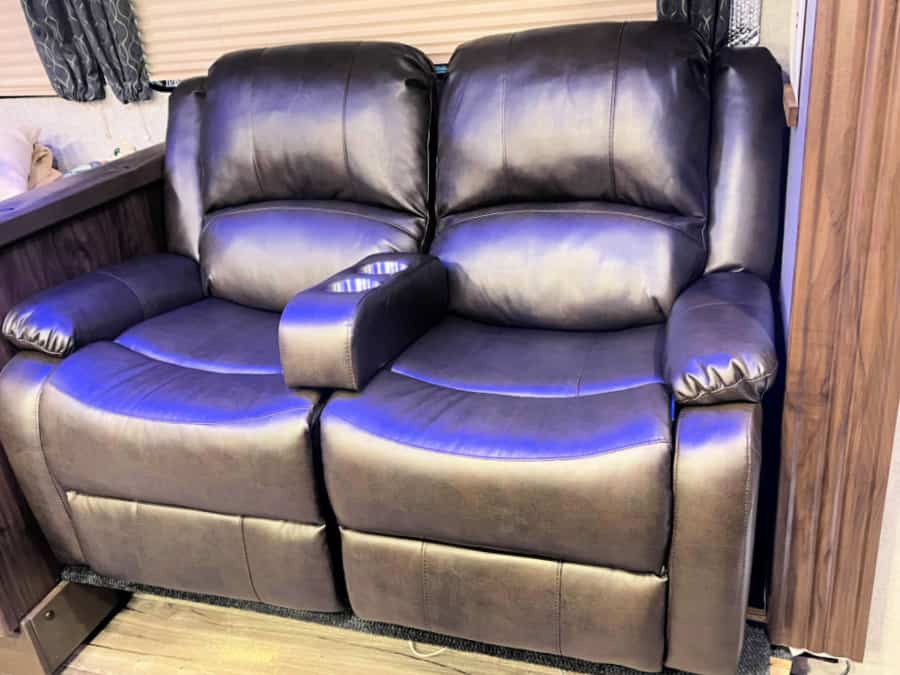
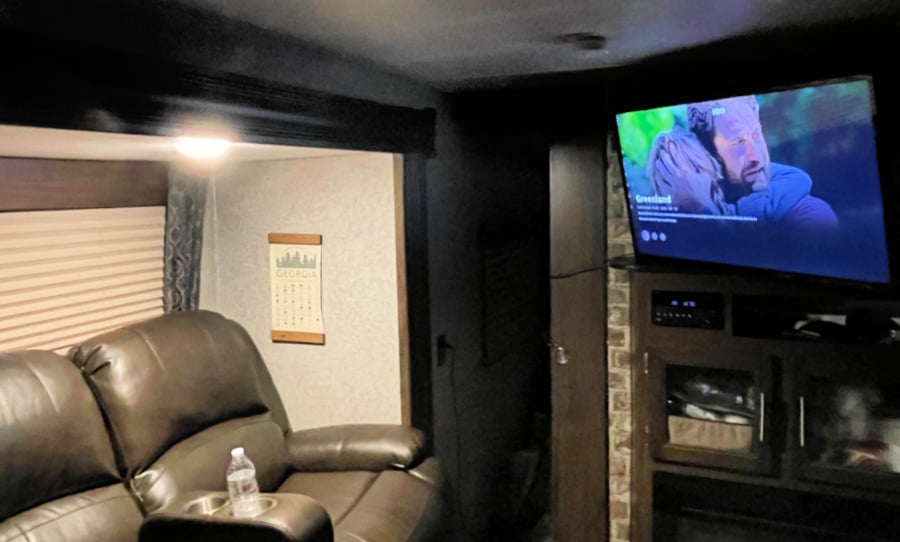
We have a Grey Wolf 26DBH, so we began looking for sofas that fit within the standard 58″ space. We aimed to find a reclining sofa and then put a swivel on the television. With this setup, we can recline the RV couch and watch TV. Everyone will have a good view, no matter where they sit in the camper.
After researching replacing an RV couch, we landed on the RecPro Charles Double RV Wall Hugger Recliner Sofa (Check it out on Amazon) or directly on the RecPro site by clicking here.) If you purchase from RecPro use the coupon code campers5 to get 5% off your order. RecPro makes this couch in many lengths. They are specifically made to work well in a camper with little room. The RecPro brand has fantastic reviews and is perfect for replacing an RV couch. In our trailer, the chestnut fabric pairs well with the current furnishings.
Replacing an RV Couch in Our Grey Wolf 26DBH
The threading began unraveling off the sofa within six months of purchasing the camper. The camper was still “new,” and it bothered us that the couch was not pristine. Then, I realized that the sofa was not covered under any warranty. At this point, I began cutting the threads. I was hoping to make it look better. However, like everything in life, new doesn’t keep. After a while, we did not care anymore that the sofa was not pretty. We did care, however, that it was not comfortable.

In replacing an RV couch, we first began taking the screws out of the sofa where it connects to the slide. It was easier to remove the back of the couch from the seat before we unattached the bottom screws. Save all decorative trim and screws if you remove them to get the couch out.

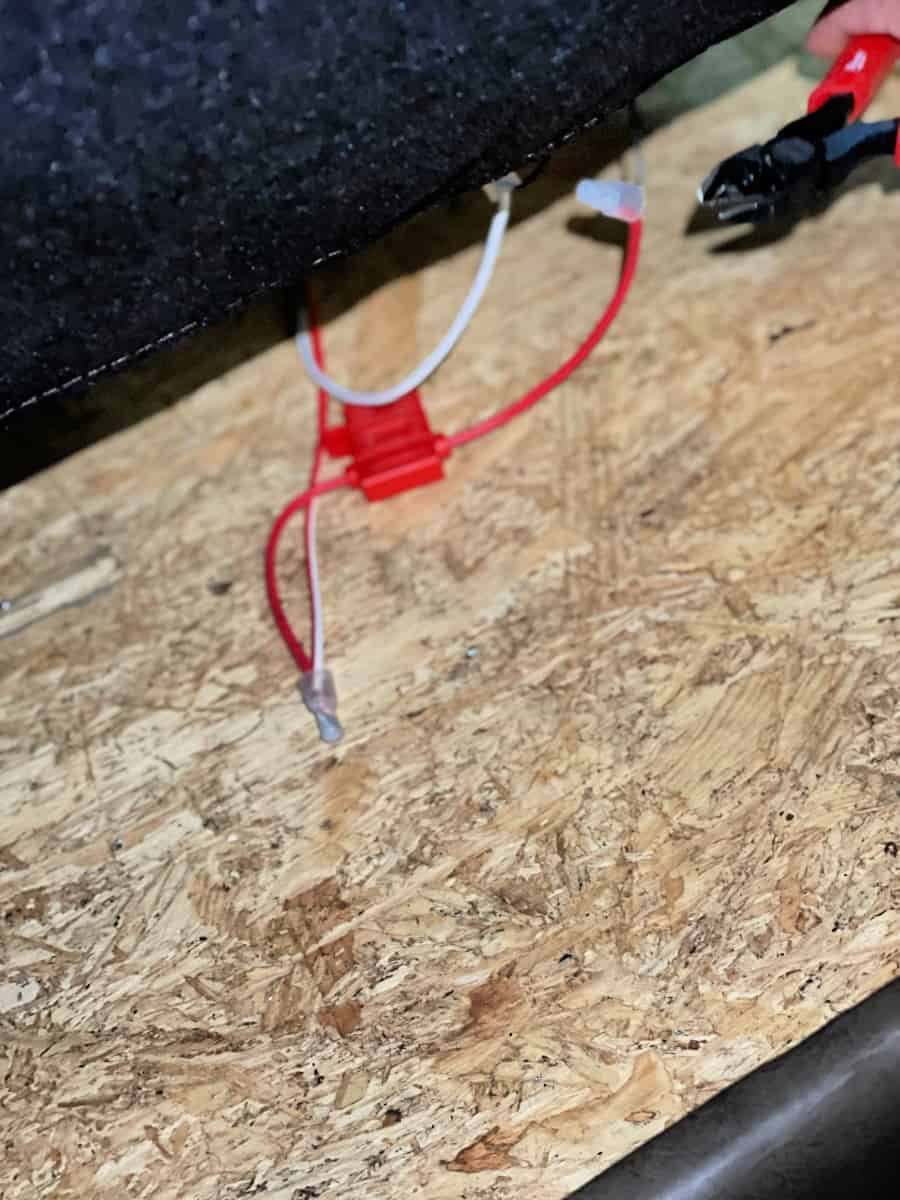
We had a USB charger built into the sofa, so Sean capped the wire that ran to the USB. If you have any electrical wires, ensure the power is off on your rig before you begin. Also, ensure that someone who understands and is trained in electrical work caps your wires.
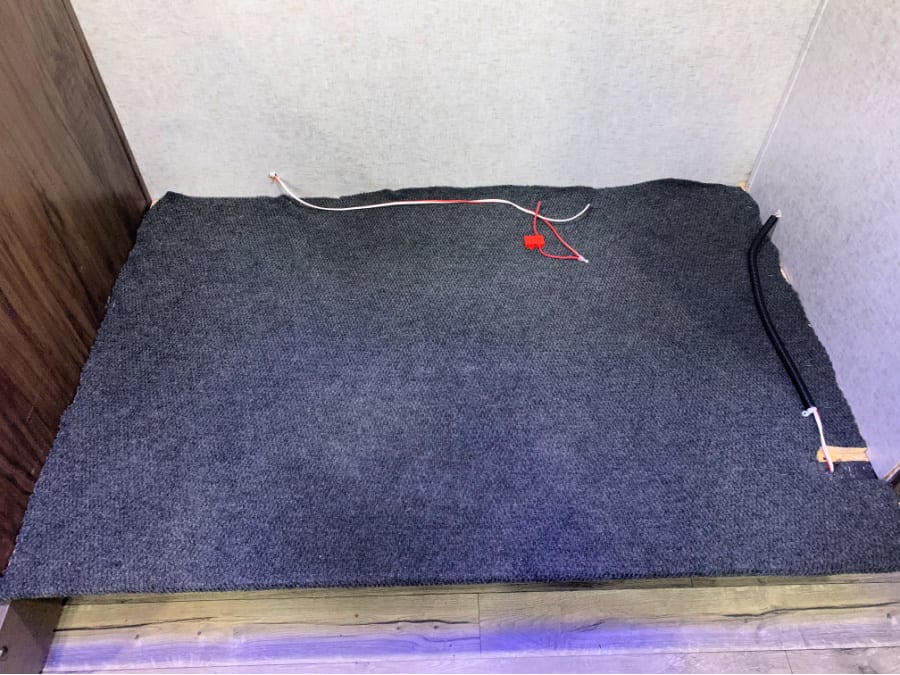
We next pried off the additional wood that the original sofa was attached to on each side.
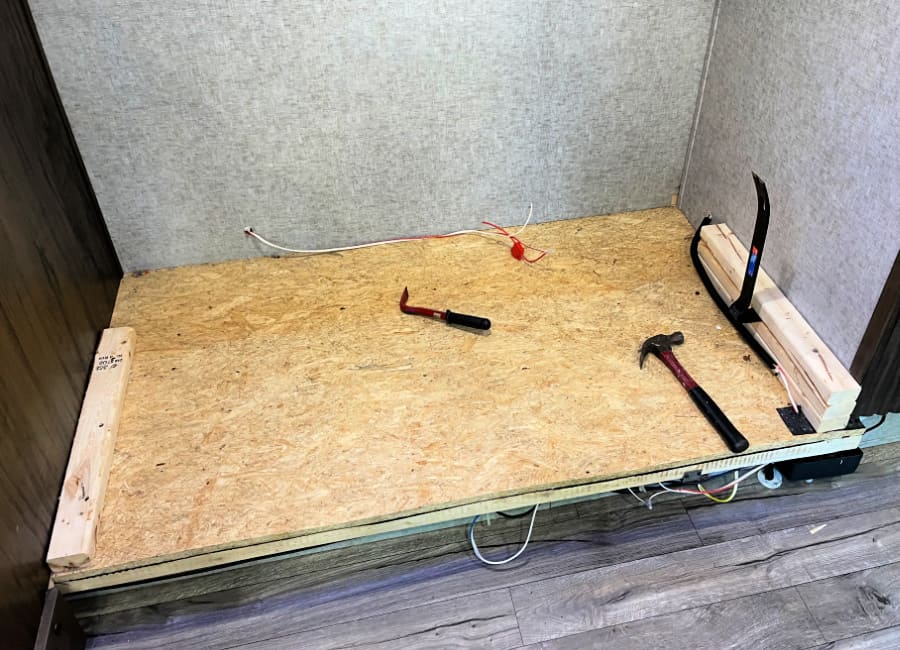
After the slide was clean and ready to use, we measured the dimensions.
The platform on our slide was 32.5″ from front to back, and our new sofa needed 37.5″ to sit on the platform and recline. Not sure how to proceed, we finally decided to go to the hardware store and buy a piece of plywood that was 5″ wider and place it on top of the current plywood. It would raise the sofa an additional 3/4,” but this was an easy solution for us because we did not mind the extra height. In addition, we chose oak plywood for its durability.
Sean was initially worried about the extra weight that the additional piece of plywood would place on the slide. However, it worked well, and there was no sagging or distress to the slide.
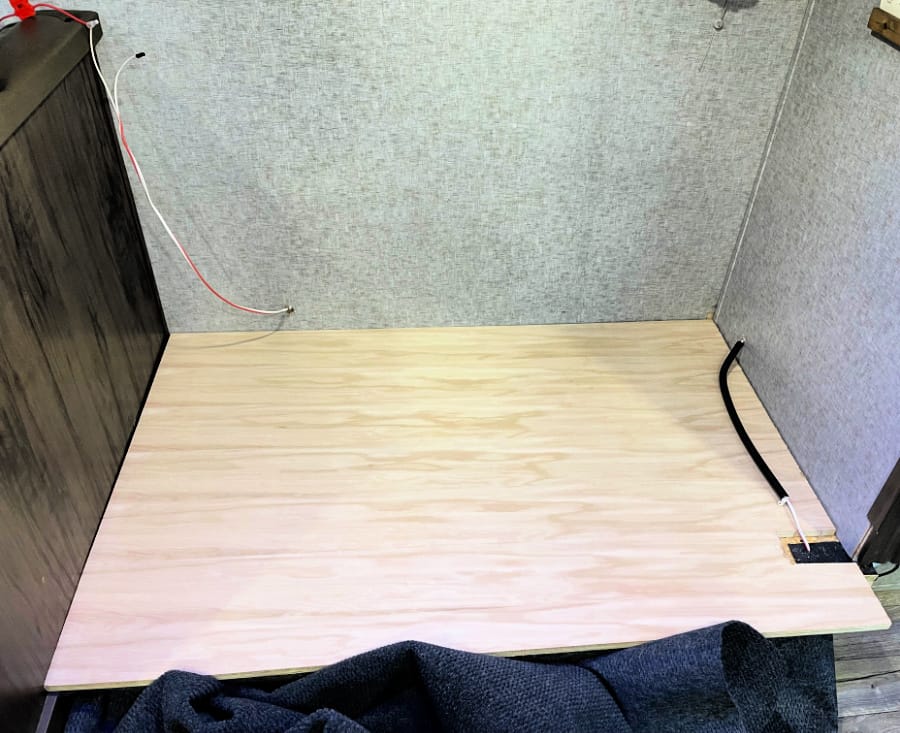
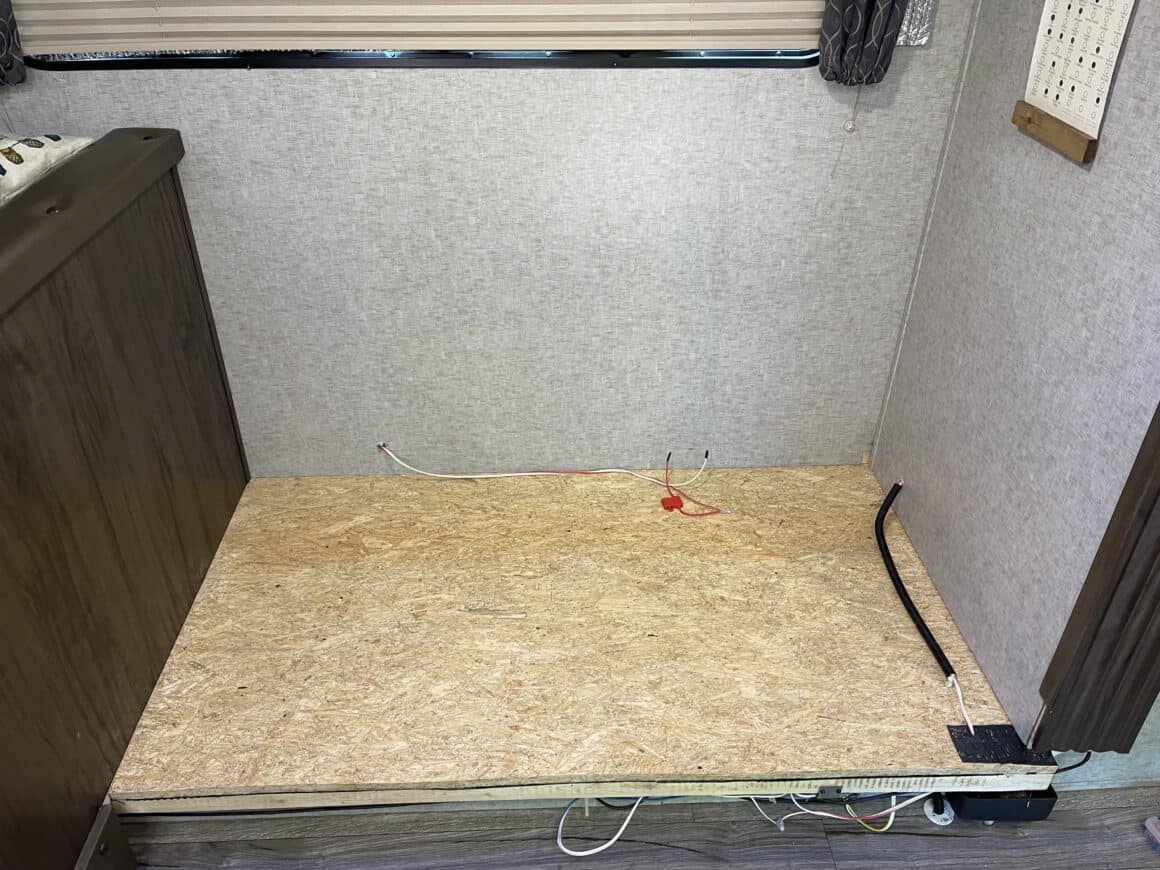
We did make a cut in the wood for wires that are running along with the sofa. These wires run to the slide controller, and we did not want to interfere with those at all!

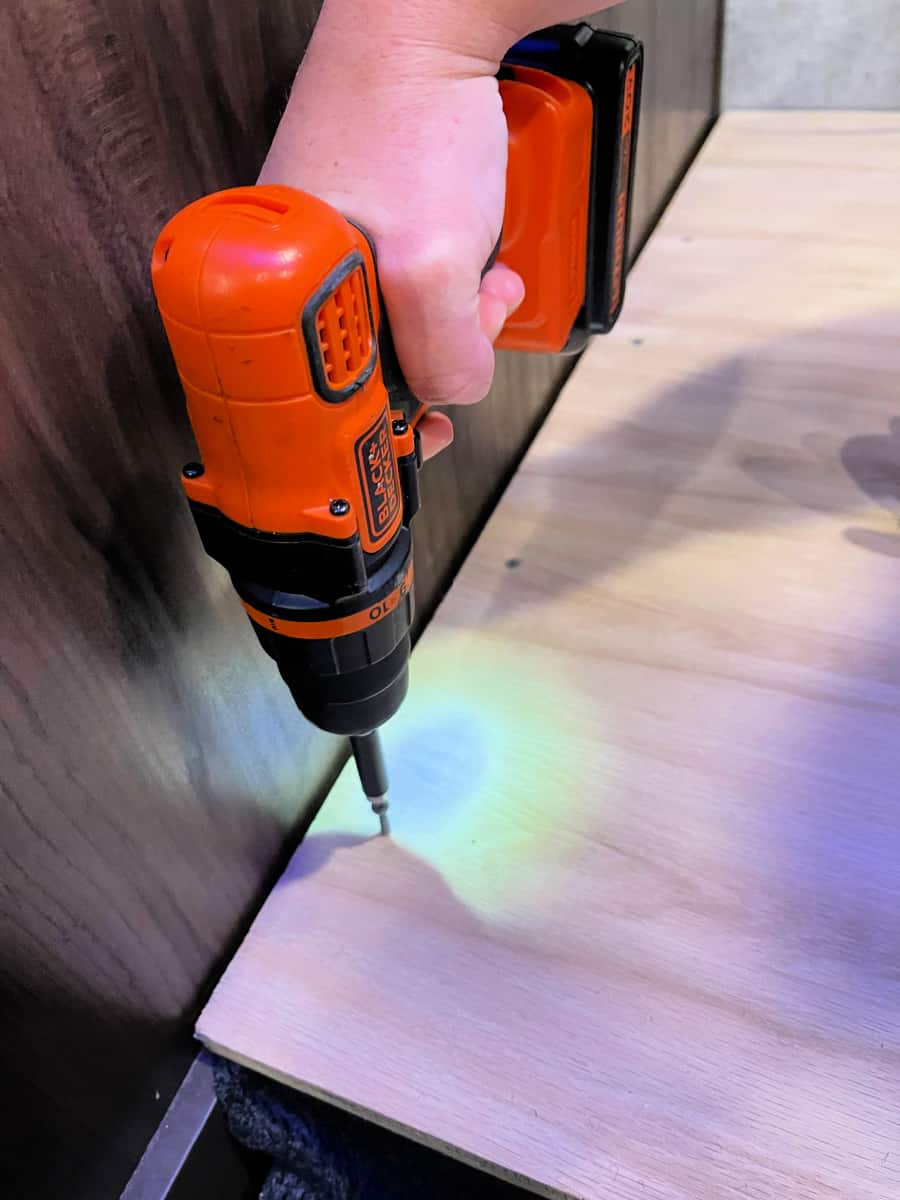
We drilled the plywood along the sides where the previous wood had been screwed. This helped ensure that we did not drill through a wire anywhere on the slide.
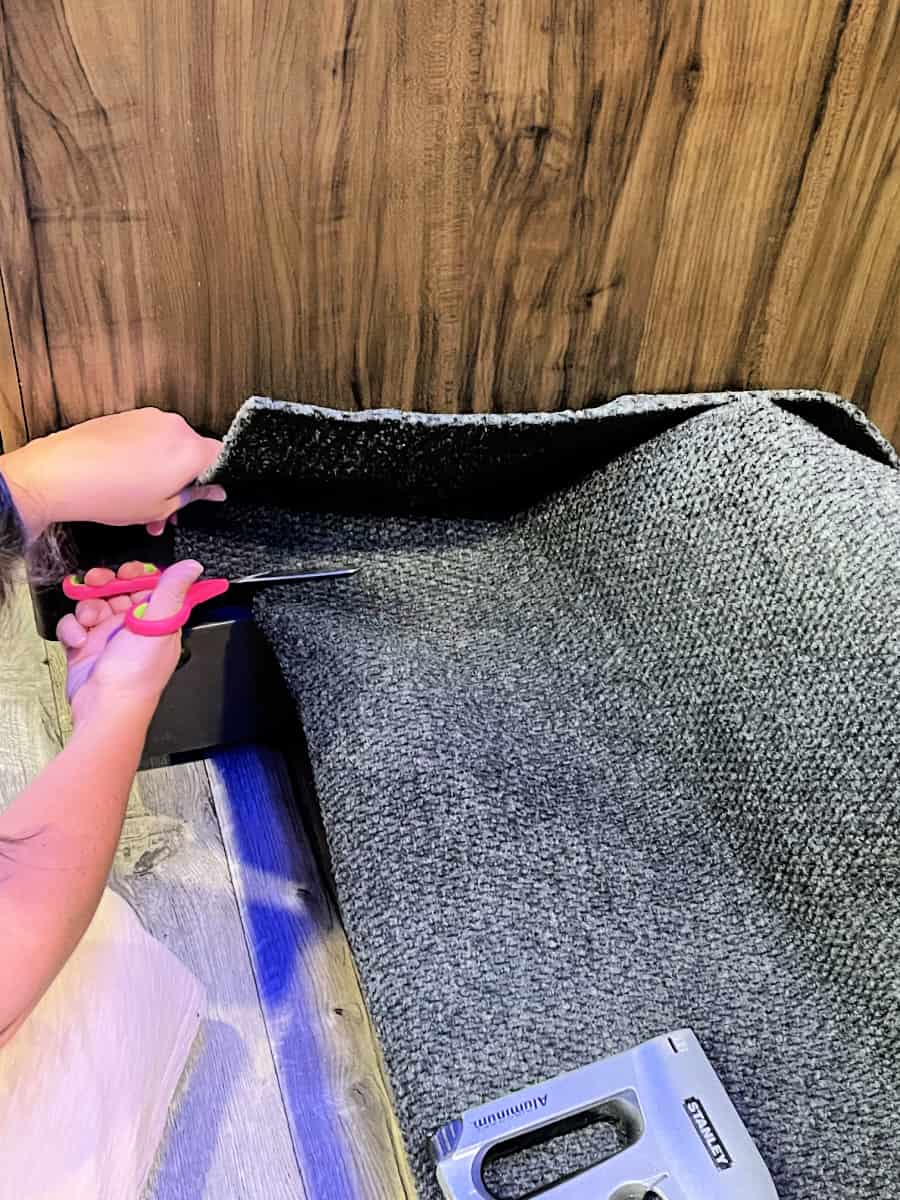
The plywood did not need to be left without a finish because the wood was untreated. We went to Home Depot to pick up a piece of carpeting. As we were looking at $100 rugs and carpet pieces, we saw a $20 indoor/outdoor rug in a bin. This rug was perfect. It was thin, yet the rug covered the area where the sofa would sit very nicely (check out a similar rug out on Amazon). First, we used a stapler (check it out on Amazon) to attach the rug to the floor. We began by stapling the front of the rug underneath the platform to wrap the carpet over the front of the plywood and then easily staple it down.
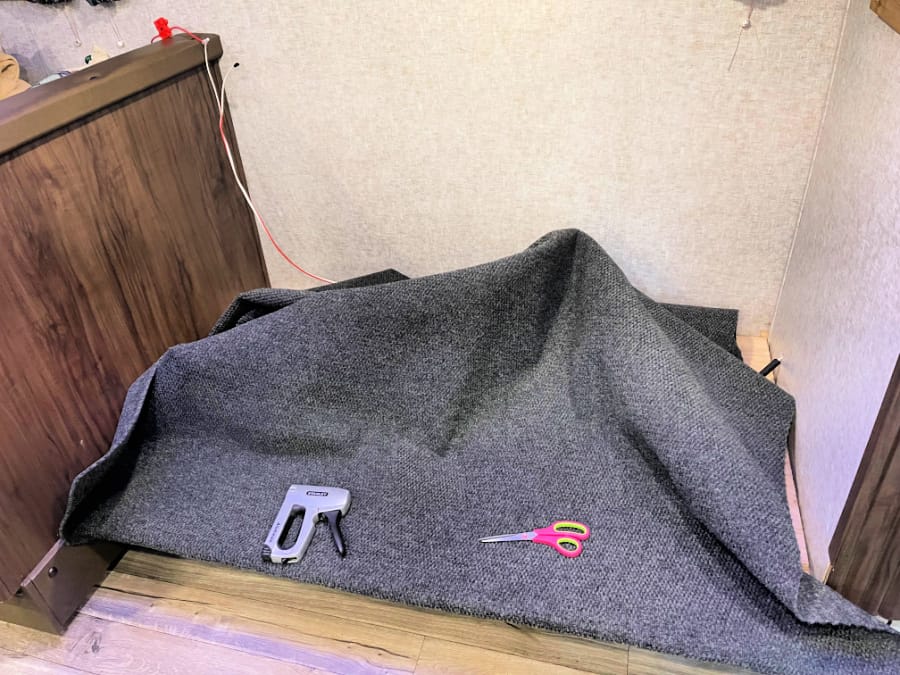
We cut the rug to size, knowing that the sofa would be sitting on it, so the cuts didn’t have to be perfect.
It was now time to place the sofa on the new platform and secure it. Our sofa came in four pieces that included two bottoms and two backs. We needed to line up both bottom pieces to be aligned just right.
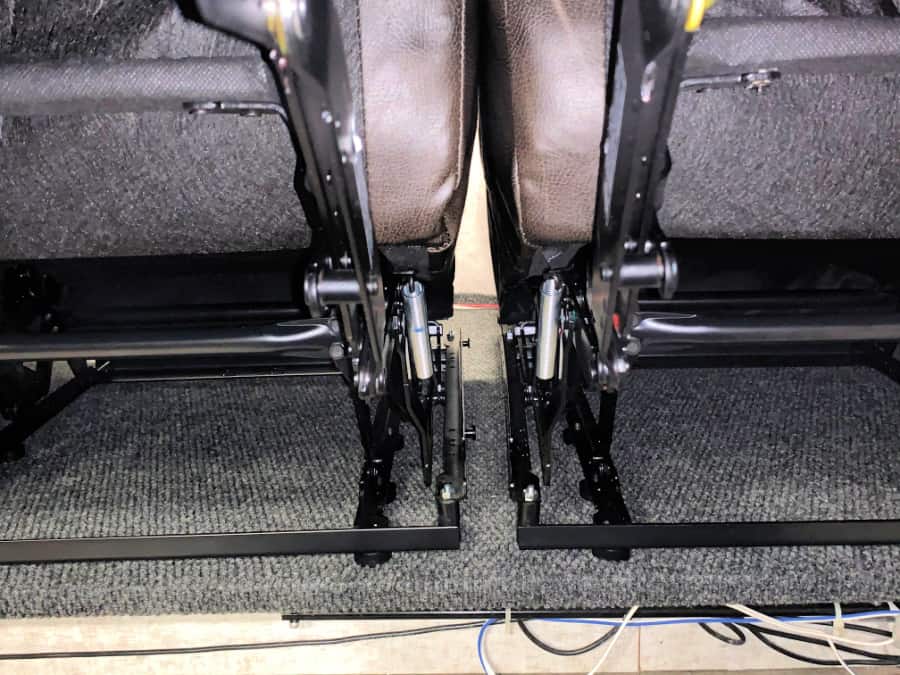
We opened both recliners and measured how far the frame was from the platform’s edge. Sean made several test runs to ensure that the sofa would recline comfortably without hitting the wall from this position.

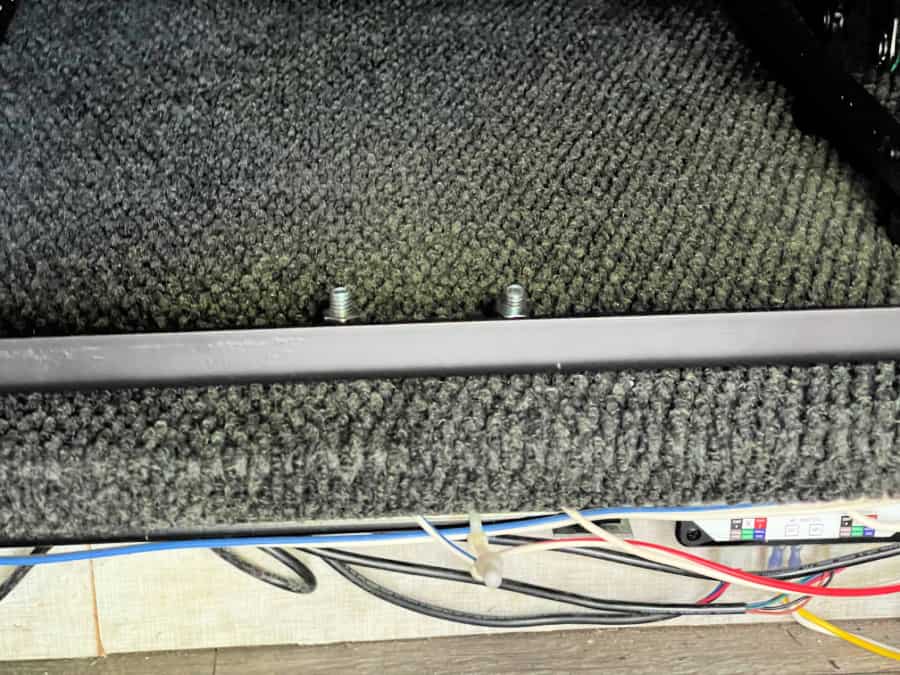
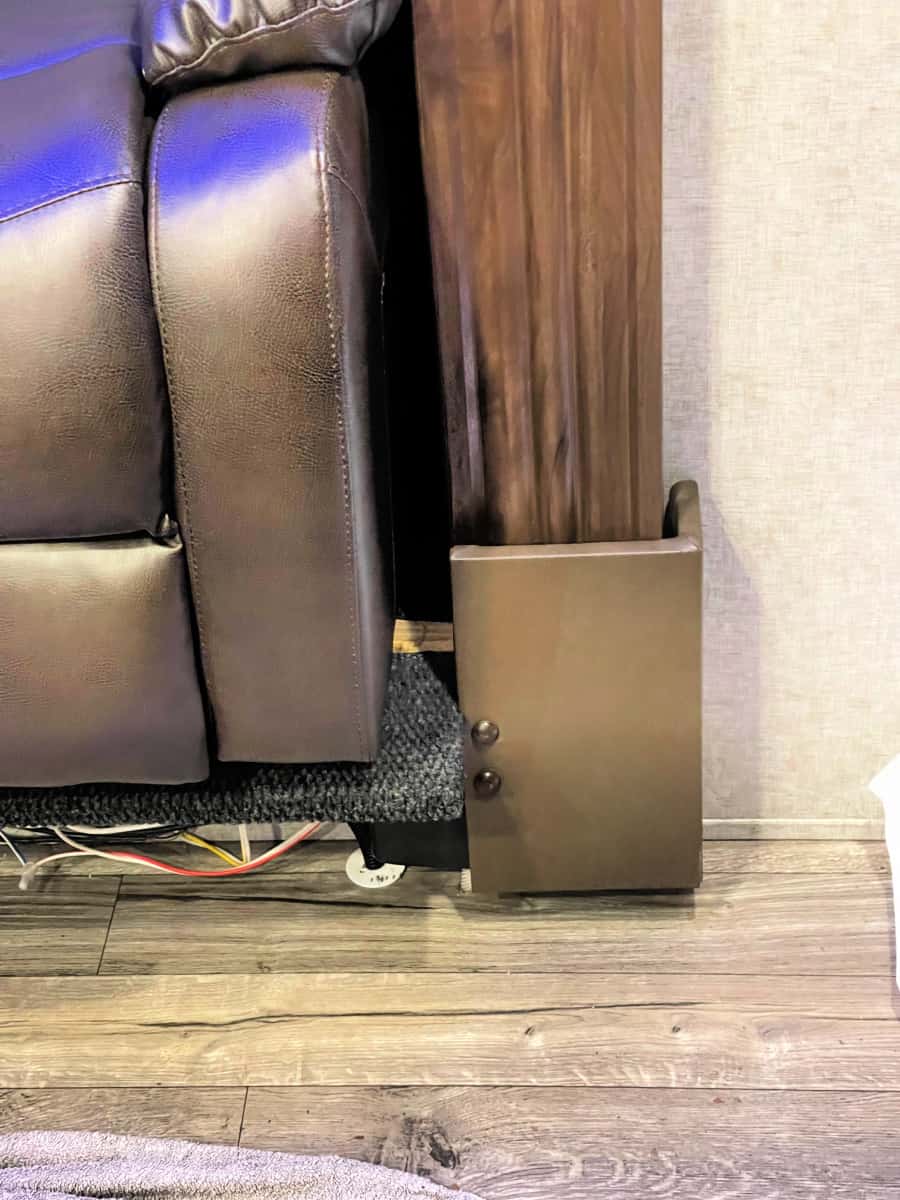
It was now time to secure the sofa to the platform. Since the new plywood stuck out over the edge of the old, it created a lip for us to secure the couch easily. In addition, the sofa frame had holes drilled in it from the factory for securing since it was designed as RV furniture.

We began by using 3/8″ bolts that were 1.5″ long. Then, we made marks on the carpet, set the sofa back, and drilled our holes through the marks for the bolts to slide through. What we realized, though, is that the 1.5″ bolt was not long enough to slide through the plywood and the frame. Instead, we switched to 3/8″ bolts that were 2″ long, and they worked perfectly.
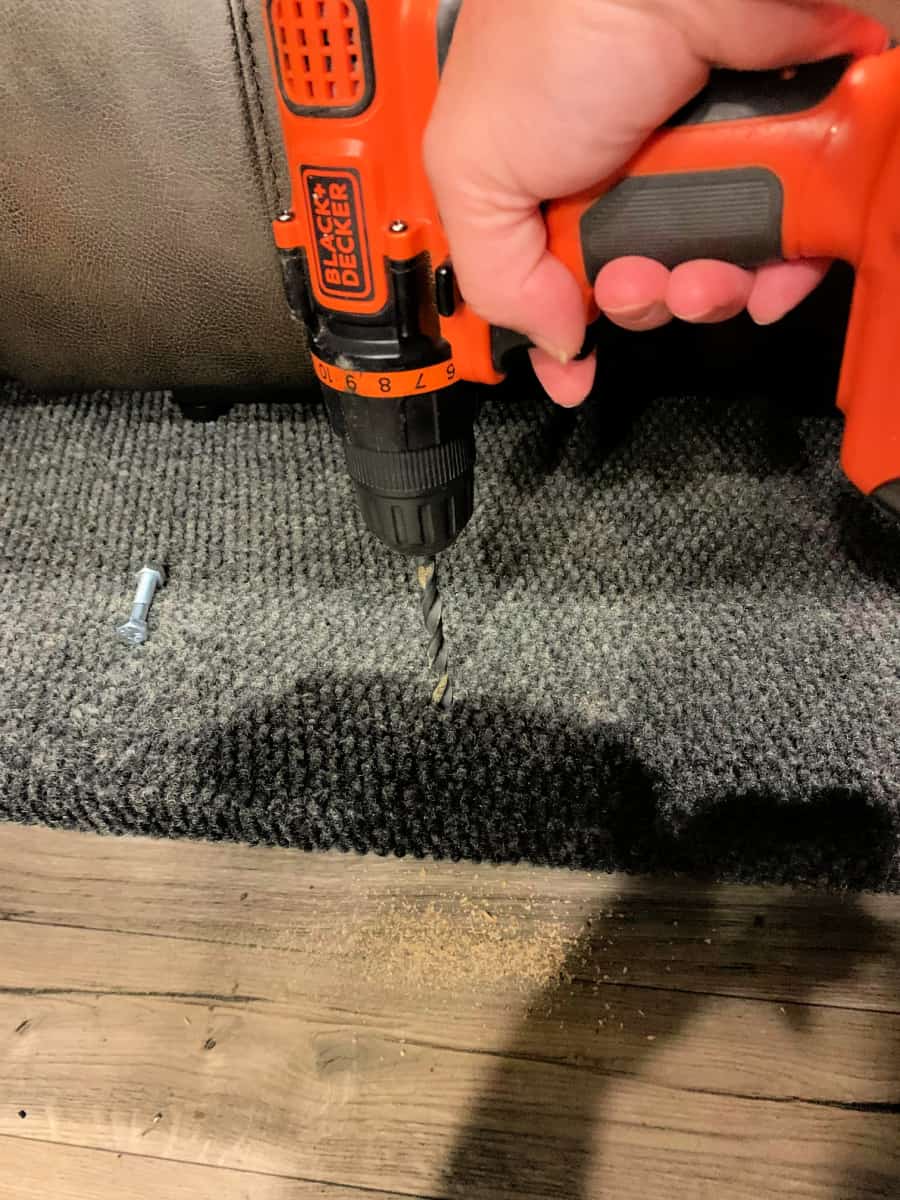
We decided to run the bolts from the bottom up into the frame to not interfere with any of the wirings under the platform.
We placed the backs on the recliners and gave them a test run.
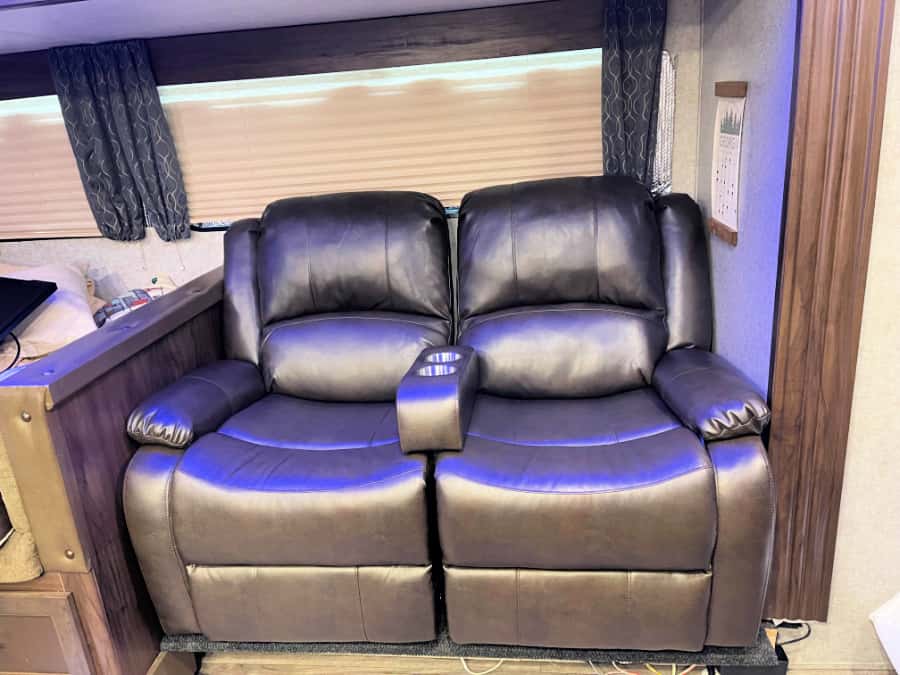
There is a gap between the bottoms of the sofas, but the frames are as close as they need to be. On our next camping trip, we will work on pushing the pieces closer and attaching them. However, the recliners themselves worked amazingly. We cleaned up our work area well, and all that was left was placing the decorative trim back on where it would fit. An extra piece of carpet was used to cover the cords that were in the original slide plywood.
We installed our new TV swivel (check it out on Amazon), and we are all set for our next adventure.
Replacing an RV couch was an easier process than we anticipated. We hope that detailing this easy process helps guide your decision to replace your sofa when you are ready. We have no regrets, and it is much more comfortable!
*Note- the drink holder arm is only available by visiting RecPro; it isn’t available on Amazon. For this option, visit RecPro by clicking here. It is a space-saving option, so although it provides extra arm and drink holders, it does not lengthen the sofa.
Are you replacing an RV couch or making any modifications to your camper? We would love to hear from you. Drop us a line in the comment section below!


Hello thank you for posting this. Did you have any issues getting the new sofa through the door of your camper? Or did you have to assemble it inside the camper? Thanks!
Hi there, thanks for reaching out. The sofa came in four separate pieces, The back was in two pieces, and the seat was in two pieces. It fit through the door easily, and then we assembled the sofa inside the camper. Hope this helps. Please let us know if you have any other questions.
Yes it only had to be bolted down in the front so it was easy to bolt.
I have a new Forest River Sabre 5th wheel and want to change the couches that it has, but cannot figure out how to get them out of the trailer. They are bigger, not secured to the floor and not in sections. Do you have any idea how I can get them out? Thanks so much.
Sorry. I am not familiar with thecouches that come in the Sabre.
Thanks for the info. We are going to be replacing our super uncomfy jack-knife sofa with recliners and this makes it look fairly easy to do:-)
Thank you. It was simple, let us know how it works out.